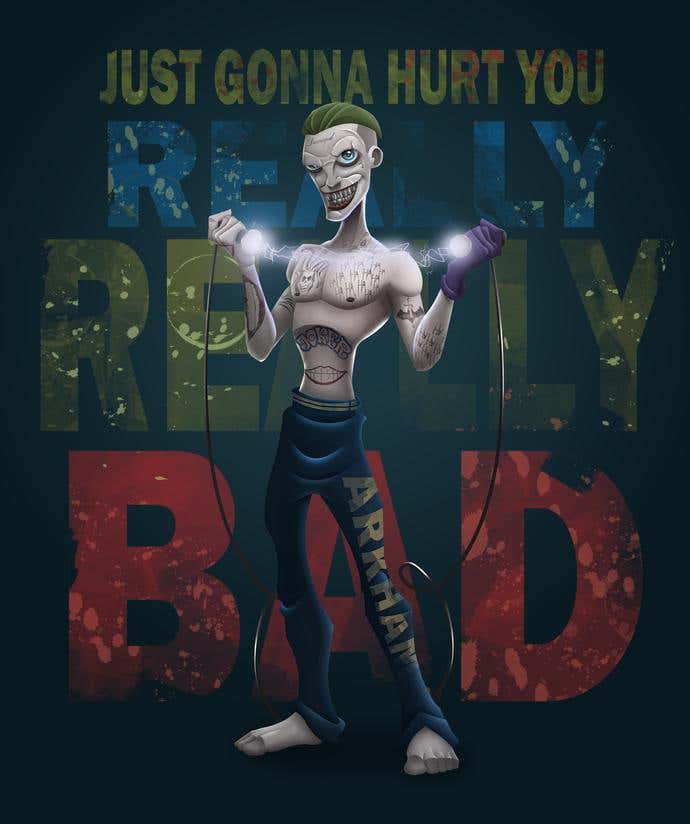
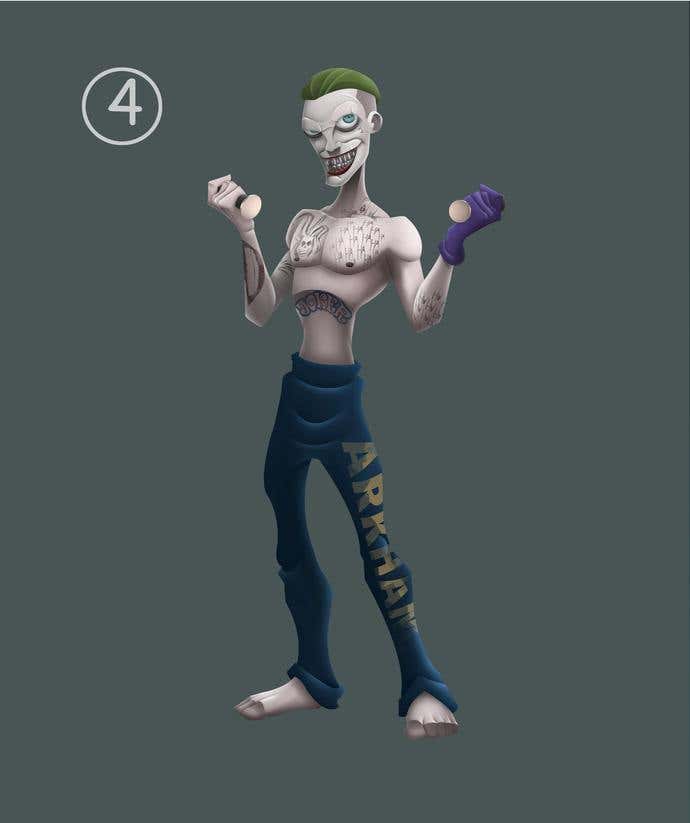
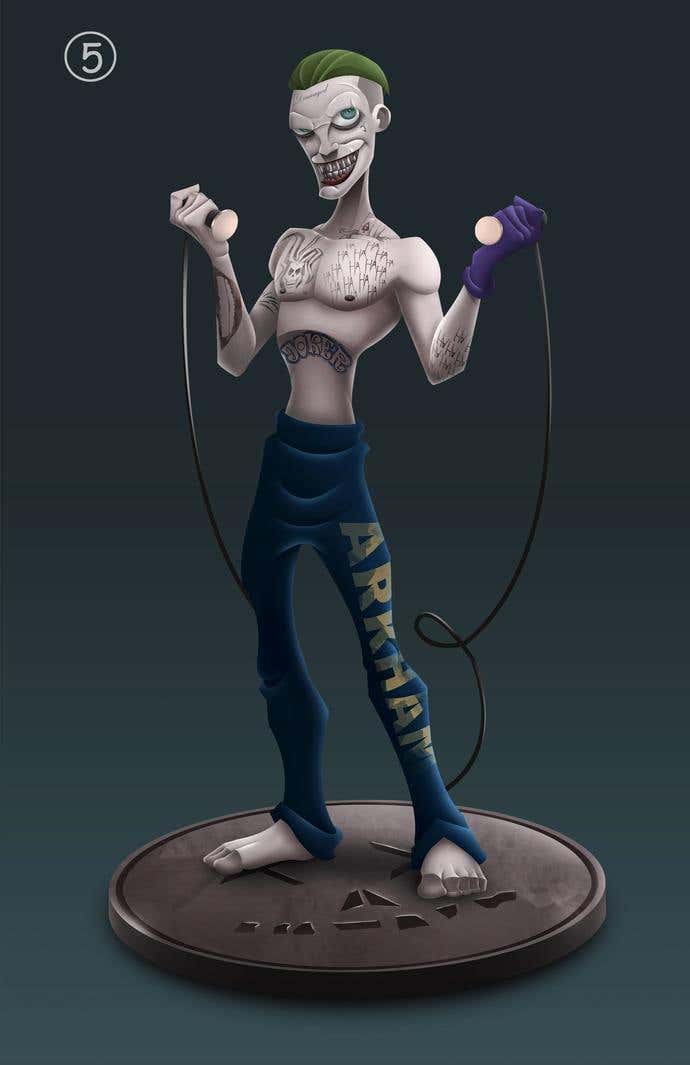
Ever wanted to learn how to draw a cartoon character? Fair warning, it’s quite a process. But, if you’re determined to learn how to draw a cartoon character, you can do it. It’s all about using the right software tools, following instructions and practice, practice, practice. For this tutorial, we’re using Joker from Suicide Squad as our model, drawn by our very own dcjoshi75.
Learning how to draw a cartoon of this nature takes about 4 hours.
Step 1
Your first order of business is to select a page preset. This means changing the page settings to the page size and type that you prefer.
For this project, we’ll go with a 3973 x 4747 pixels as our chosen page preset. We’ll also use a 72-pixel resolution.
The best way to go about designing a cartoon person or character is by using a base sketch as a starting point. Some people prefer hand sketching but it is very possible to start with a digital base sketch, which is what we’ll be doing.
This is how we will go about making a rough base sketch of the character on a new layer:
-
We will use brush 30, with a 95% hardness and 25% spacing.
-
Our foreground color of choice will be black.
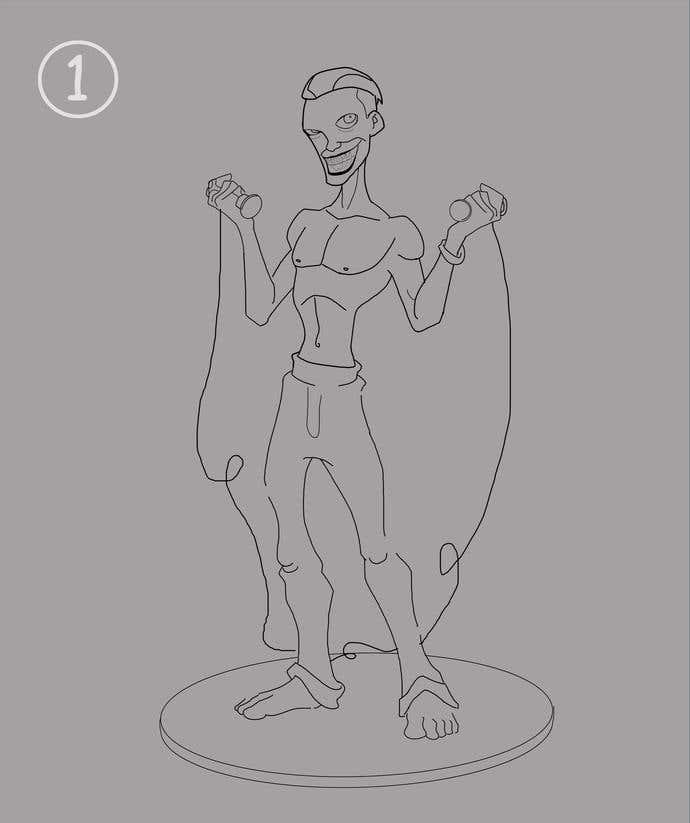
Remember it’s all about practice, practice, practice. Keep at it until your hand can flow smoothly.
If you’re having a difficult time creating a digital base sketch, you can opt for the manual route. Just create a rough base sketch on paper, scan the image and import it into Adobe Photoshop. It doesn’t matter if the sketch is a bit messy. The final product does not require the rough sketch.
Step 2
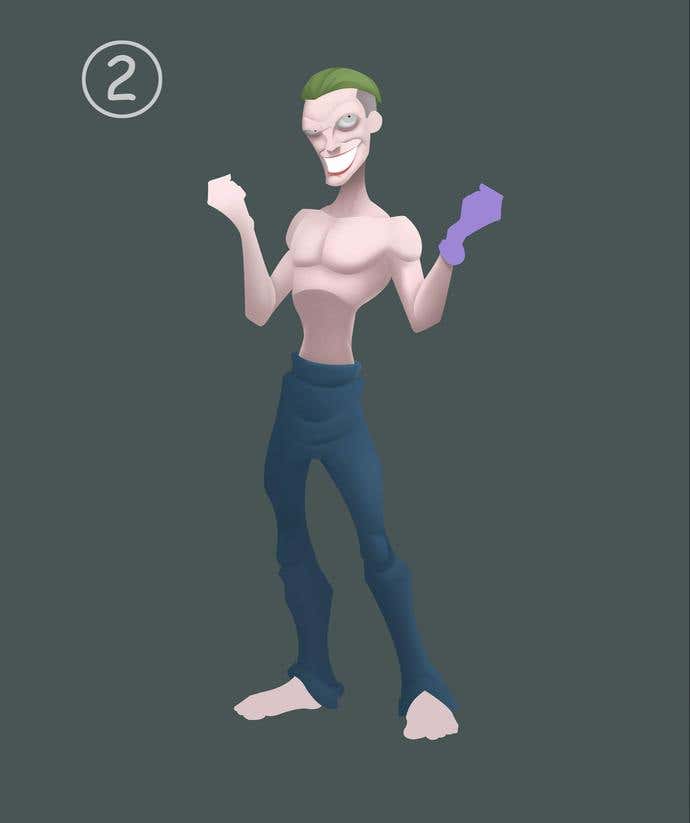
When your base sketch is complete, the next order of business is to lay down some color. This will require you to place the sketch layer on the top, and decrease its opacity to 40%-50%.
Once that is done, create a new layer and give it a name of the body part you want to color first. For example, if you want to color the head first, name that layer “head”.
Select the Pen tool.
Select a foreground color that you want to use in order to fill in the head area.
Now, choose the outlines of the head very carefully. When the head is selected, right click and a tab will open up:
-
Select the fill path:- [Content-use: foreground color; Blending-mode: Normal; Opacity: 100; Rendering-feather: 0; Anti-alias: On]
-
Hit OK
-
The color will be filled to your selected area. When complete, right click again and click Delete Path.
-
Repeat the above steps for every part of the Joker and remember to choose a new layer for the hair, retina, eyes, mouth, head, shockers, gloves, body, pants and feet.
When the process of filling your cartoon character with color is complete, you’ll have to determine the direction of your light source. This point will determine where the shadows and highlights on your cartoon character will fall.
For this project, the light source on our cartoon character will be on the left side. So, our next step will be to apply light shadows on our Joker cartoon.
Let’s start with his face:
-
Pick a darker color in the foreground section (for this cartoon character we’ll use a dark grey or black color).
-
Make a new layer above the head layer. This new layer will be used to add shadows on the Joker’s face.
-
Apply light shadows with a Soft Brush 30 [Hardness: 0%; Spacing: 25%; Opacity: 20%; Flow: 25%].
-
Use the Lasso Tool [0% Feather] to etch out the details.
-
Repeat this process on the other parts of the character.
-
To etch out the chest area: select the area, and then apply the shadows inside the selected region.
-
Do the same for the muscles, waist region and other parts of the character’s body.
PRO TIP: Remember to always make an extra layer for every body part. That way if you make a mistake your base remains unharmed and you don’t have to recreate everything from scratch.
Step 3
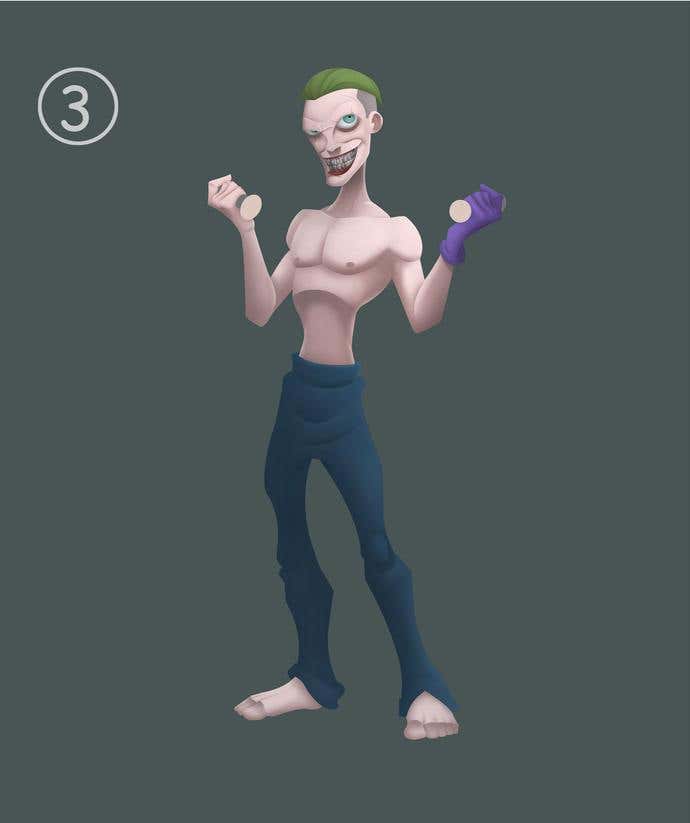
Follow the same process you used on the muscles and facial expressions to etch out the pants and toe joints.
To design wounds on the character, select the area where you want the wounds to be, and color it with the same soft brush.
Use darker greys and white colors [Hardness: 0%; Spacing: 25%; Opacity: 25%; Flow: 25%] to give the teeth a metallic tone.
Then add joints to the fingers and gloves in the same way that we detailed the toes.
Step 4
We’re now done with the light tones. So, this step is all about adding darker shadows to our cartoon character.
PRO TIP: It’s important for you to learn how shadows and highlights fall on different regions. You can do this by studying the environment and how lights and shadows behave in different settings.
If you’re happy with the light shadow tones we did in Step 2 and Step 3, merge them with the base layers of the cartoon character. Here’s an example of how to do it:
-
Body Shadow and BODY: Merge (ctrl+E) both of these layers and then repeat the same step with every other layer.
-
Select the Burn tool and set it to Mid-tones [Exposure: 22%; turn on Protect Tone; Brush: 30].
-
Start applying the burn tool where you think the darker shadows should be. These areas may include the neck, under the eyes, armpits, right-hand side arm, right side of the pants, folds of the pants, toe joints, hair depths, under the nose, hollow of the ears, cheek lines, and forehead lines and on the wounds and scars.
Adjust the exposure of the Burn tool according to your requirements.
To add the Joker’s tattoos:
-
Make a sketch of the tattoos on a new layer
-
Select the outline of the tattoos with the Lasso tool
-
Select Brush 36 with a darker foreground color [Opacity: 32%; Flow: 100%]
-
Apply the brush on the selected area
-
Repeat the entire process for every tattoo region.
Now for the Arkham logo:
-
Select text. We’ve used the font IMPACT
-
Rasterize the text and then place it vertically near the leg
-
Hit crtl+T and right click the text
-
Select warp and adjust the text within the leg layer.
-
Create a new layer and select Brush 36 [Opacity: 32%; Flow: 100%] and color the selected area.
Now that we’re done with the shadows, let’s move onto some highlights:
-
Select the foreground color - white
-
Select Brush 30 [Hardness: 0%; Spacing: 25%; Opacity: 20%; Flow: 25%]
-
Apply color to the region that you think light would bounce off of, including the hair lines, forehead, cheeks, chin, ears, chest, fingers and glove lines, shoulders, feet and edges of the body.
PRO TIP: Always consider creating a secondary light source on the shadow side of the body but color only the edges. It tends to give the cartoon character a more realistic look.
Step 5
To finalize your Joker cartoon, start by merging all the layers:
-
Go to filter>sharpen>sharpen
-
Select the Dodge tool with a highlight setting and Brush 30 [Hardness: 0%; Spacing: 25%; Exposure: 20%]
-
Use the Dodge tool to the area where the light falls
-
Apply a gradient background using the Gradient tool and we’re finished!
Want To Bring Your Cartoon Character To Life?
So you have an awesome idea for a cartoon character, but you're just having a little trouble bringing it to life. You just need a helping hand. Freelancer houses thousands of the best illustrators from around the world, so you'll be sure to find the right illustrator to bring your project from conception to fruition. Simply post a project, and you'll receive bids within minutes. Get started today!
